 It’s time for my weekly cake post!
I am really enjoying this project. I feel like my knowledge of scratch cake baking is expanding quite rapidly and we are trying things I wouldn’t have otherwise. It’s a very challenging project considering cakes are about the most difficult thing one could choose to bake at high altitude. I think I am glad I waited to do this until we moved couple thousand feet lower though. The challenge would have been even greater living in Colorado Springs.
I discovered the hard way that this particular cake MUST. MUST. MUST have parchment in the bottom of the pan when you bake it. I ended up baking 3 layers because the recipe called for an 8″ pan but I have found this book wants you to have very thin layers which I don’t like the look of. I like tall cakes 
The first layer of this cake sunk like crazy when I baked it. So that was a flop, but I turned it out onto a plate so I could eat it and make sure the cake was good. It was lovely.
Light airy crumb, good chocolate flavor, maybe could use a little more chocolate but I figured that could be made up for with the icing. It had a good texture though and that is important.
So the second layer, I buttered and dusted the pan with cocoa powder and adjusted the batter and oven temperature and tried again. This one came out perfectly, but stuck to the pan and I was only able to get half out.
I hate that!
Plus I knew I had only enough batter left to make one more layer. I was determined to have something to photograph for you, so I cut out a piece of parchment, fitted it into the pan and buttered and dusted with cocoa powder. Poured in the remaining batter and baked away.
It came out perfectly and also came out of the pan perfectly.
But how was I going to present a one layer cake? Hmmmm. I decided to sleep on it and wrapped it up and set it aside.
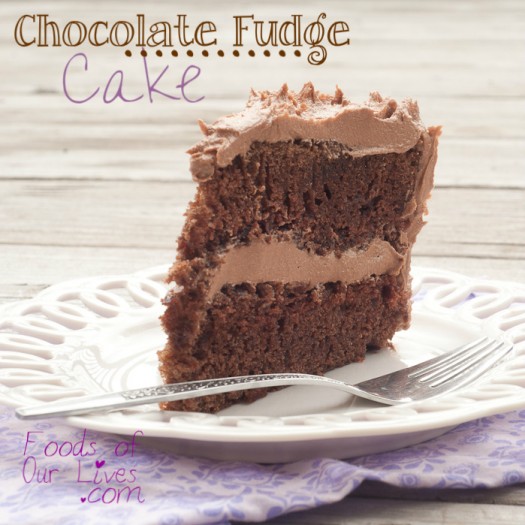
It took me a bit but I finally came up with a solution. The next day, I simply cut the one layer into slices of cake and iced and stacked them to look as if I had actually made an entire cake. Tricky eh?
I think it turned out ok.
Plus it was kind of nice not having a chocolate cake sitting on my counter, taunting me to eat just a little more…. my children devoured the piece as soon I had it photographed.
I am within the last 8 pounds of getting back to my pre-baby weight and I don’t think this project is helping me at all. But at least I am having fun, right?
- 3 oz dark chocolate
- ¾ cup boiling water
- 2 cups sifted cake flour
- ¾ teaspoon baking soda
- ½ teaspoon baking powder
- ½ teaspoon salt
- ½ cup lard (you can use butter or coconut oil, coconut oil does give it a coconut flavor though)
- 1½ teaspoons vanilla extract
- 1 teaspoon rum extract
- 1½ cups granulated sugar
- 2 eggs, beaten
- ⅓ cup buttermilk (you can use 1 teaspoon vinegar or lemon juice mixed with ⅓ cup regular milk)
- Preheat your oven to 350˚ and prepare a 6" cake pan (or an 8" and then double the recipe). To prepare the pan, cut out a piece of parchment paper to fit the bottom of the pan, place it in the pan and brush the parchment and pan with butter and coat with cocoa powder, tapping out the excess.
- In the top of a double boiler, combine the chocolate and boiling water. Stir until the chocolate is melted and the mixture has thickened. Set aside to cool.
- In a medium mixing bowl, sift together the flour, baking soda, baking powder and salt, set aside.
- In the bowl of an electric mixer, fitted with a paddle attachment, cream together the lard, and extracts then slowly add the sugar. Beat on medium high until fluffy, about 3-4 minutes.
- Add the eggs, one at a time and then slowly stir in the melted, cooled chocolate mixture.
- Alternately add the buttermilk and dry ingredients, beating until smooth between each addition. Start and end with the dry ingredients.
- Pour the batter into the prepared cake pans and bake until a toothpick inserted into the center comes out clean, about 30 minutes. Cool 15 minutes in the pan and then run a knife around the edge to loosen and turn out onto a cooling rack.
- Cool completely before frosting

- Huckleberry Plum Pie - January 1, 2017
- Fresh Mango Sorbet - July 17, 2016
- Steak Caesar Salad - June 8, 2016

