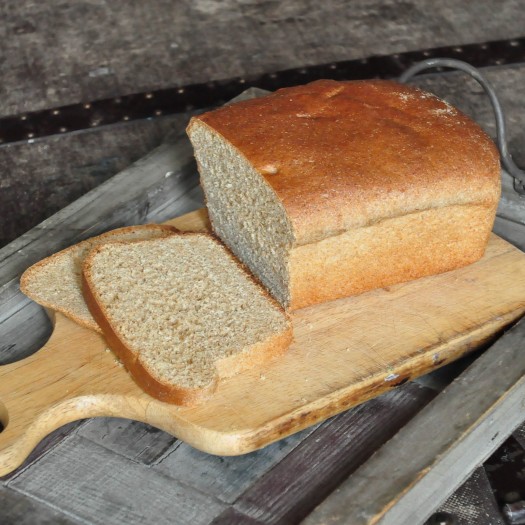
I have been wanting to post this recipe for some time now but it is so completely versatile that I have had a difficult time deciding how to categorize it.
But I know I need to post this because you need to make it. Well ‘you’ being those of you who follow this blog of mine who have access to freshly ground flour. I have never tried this recipe with anything but fresh flour so I am not sure what it would be like if you were to use store bought whole wheat flour – perhaps a combination of white and wheat would work but then you are not going to be getting all the wonderful health benefits that you normally would from a fresh whole grain flour.
Freshly ground flour is about 100% better in taste and texture than the stale stuff you get from the grocery store. Because of this I am able to get away with feeding my family breads that are completely whole grain and they don’t hardly even notice.
In fact the fresh ground flour is so light weight that for most recipes I have to weigh my flour (this recipe was developed for fresh flour so no need for that – I am talking about when I convert recipes that were developed for white, all-purpose flour). Usually for every cup of all-purpose flour called for in a recipe I end up using close to a cup and a half for it to have the same texture. That’s a huge difference! Here is the link for the scale I use:
Anyway, this recipe as I said was developed for fresh flour so you can use a measuring cup
I not only use this bread recipe for my weekly bread baking, but I also use it for making dinner rolls, cinnamon rolls, hot cross buns, pizza dough, you name it. What I really love is that it is a huge recipe – makes 4-5 loaves of bread – so what I love doing is making 3 loaves of bread and then making a small batch of cinnamon rolls or 2 loaves of bread, a batch of dinner rolls and a batch of cinnamon rolls. For Easter I made two batches of dough and got a dozen dinner rolls, 2 dozen hot cross buns and 4 loaves of bread.
One of the other things I love about this recipe is it doesn’t require a lot of time, there’s no proofing, hardly any rising and no add this, then that. You just dump everything in your mixer, mix it up, dump in your bread pans, let it rise for bit and then bake it. As my oldest child likes to say, “Easy peasy, lemon squeezy!”
Alright let’s get started:
- 3 tablespoons SAF instant yeast
- 2 rounded tablespoons gluten flour (I use ¼ cup when I am mixing in non-gluten flours like oat or barley)
- 1 tablespoon REAL salt (kosher or sea salt work great also)
- 5 cups warm water
- ½ cup honey
- ½ cup olive oil
- 12 cups whole wheat flour (my favorite is hard red wheat but I often throw in a couple cups of oat or barley flour)
- Mill 8 cups of wheat grain.
- Put all the other ingredients into the bowl of a mixer.
- Add about 6 cups of the flour, until you have a kneadable dough. This is the point where the mixer you have is going to determine your next step.
- This is a large recipe, if you have the usual 4-5 quart KitchenAid stand mixer you will probably be smart to pull the dough out and hand knead the rest of the way. I have a 6 quart mixer that my husband replace a plastic part on with a metal so it can handle this recipe, however, the first time I made this, I did just about burn out my mixer. Now that the plastic part has been replaced I have no problem with this recipe.
- Of course the ideal bread dough mixer is the Bosch but I haven't had a reason to upgrade to that yet so I haven't. If you are fortunate enough to have this lovely device you will want to start out mixing at speed 1 and then increase to speed 2. With my KitchenAid I usually put it on the 4 with the dough hook.
- If you have a mixer that can handle this then continue adding flour until the dough pulls away from the sides and then knead for 10 minutes. I do usually add all the flour and it comes out perfectly.
- If you are hand kneading then continue adding the flour as you knead and maybe add an extra minute or so on to the kneading time.
- While the dough is kneading, brush your loaf pans with butter.
- Put a little oil or soft butter on your hands and divide the dough between the pans.
- Let rise on the counter in a warm spot until doubled in size. At this altitude (about 7000ft) I only let mine rise about 15 minutes, just while the oven is preheating. But if you are at sea level you may need more like 25-30 minutes. If you try it let us know!
- Place in a preheated 350˚ oven for approximately 30 minutes.
- Allow to cool about 10 minutes or so in the pans and then remove and allow to cool completely on a wire rack before bagging.
- I usually keep one loaf out to eat and freeze the others and they actually do freeze very nicely!
Thanks for the wonderful recipe: Donna’s Delight’s Cookbook, Taste of Life in Monument, CO (if you live in the area and want to know more about grinding your own flour and getting set up for that Donna can help you out! Here’s their website: http://staffoflife.biz/)
- Huckleberry Plum Pie - January 1, 2017
- Fresh Mango Sorbet - July 17, 2016
- Steak Caesar Salad - June 8, 2016


